How to Perform a Debtor Name Search
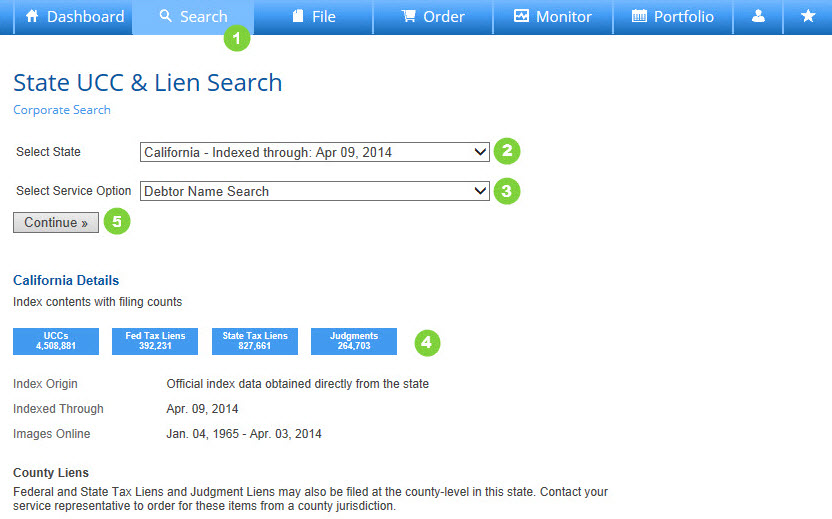
- Press Search on the Main Navigation Bar.
- Choose a State from the drop down box.
- Choose Debtor Name Search from the drop down box.
- Review State Details for any state-specific information that may affect your search.
- Press Continue to advance.
_________________________________________________
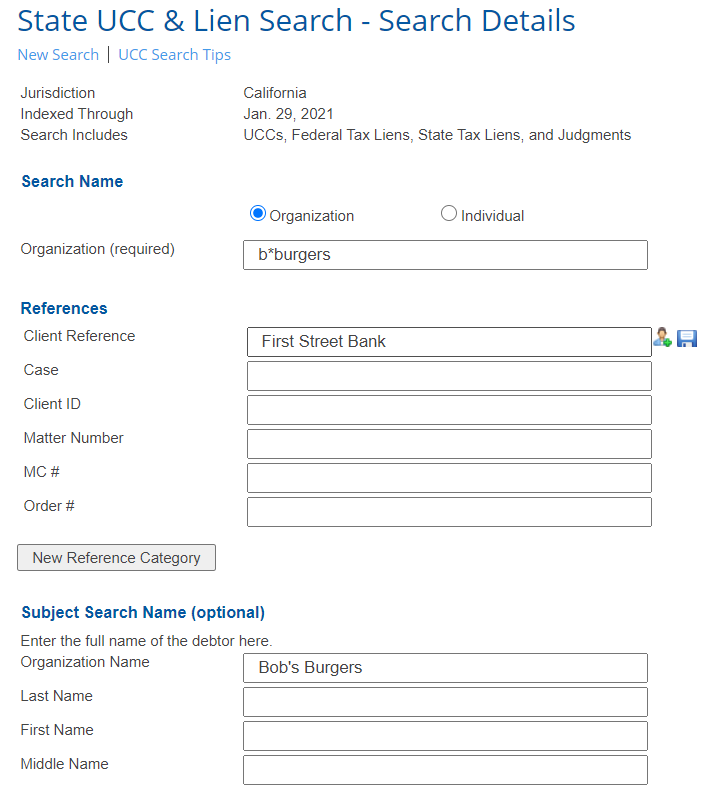
Perform a Debtor Name Search by Organization
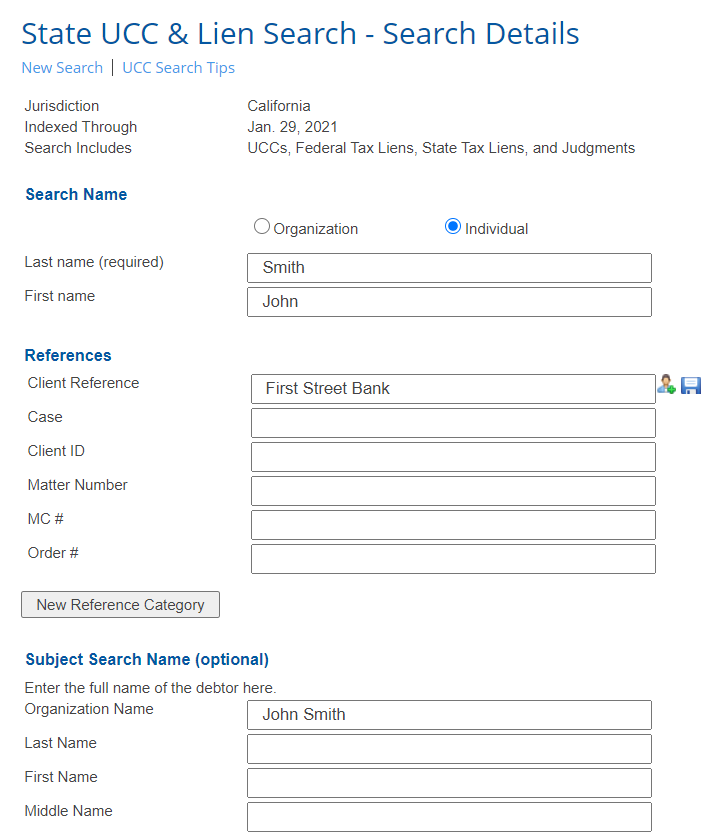
Perform a Debtor Name Search by Individual Name
- Refer to UCC Search Tips for information on how to best structure your search string.
- To search by Organization, select the Organization radio button. To search by Individual, select the individual Radio button.
- If searching by Organization, enter a business name or truncated search name in the Organization field (required).
- If searching by Individual, enter the last name of the individual (required) and a first name, although a first name is not required.
- Enter a Client Reference if you want or need to. This will appear on your monthly FCS invoice. Additionally, you may enter a Matter Number. Save Standard Reference Information by clicking the Save (disk) Icon; access previously saved references by clicking on the Reference Library (person) Icon. (Note: Save and Reference Library icons will not load until you click into the field.)
- Add a New Reference Category such as Project Name or Cost Center. The new reference category will be available as a reference field for this and all future search efforts.
- Indicate any Additional Options you wish to include.
- Press Perform Search to advance.
Perform a Debtor Name Search – Initial Results and Advanced Filtering
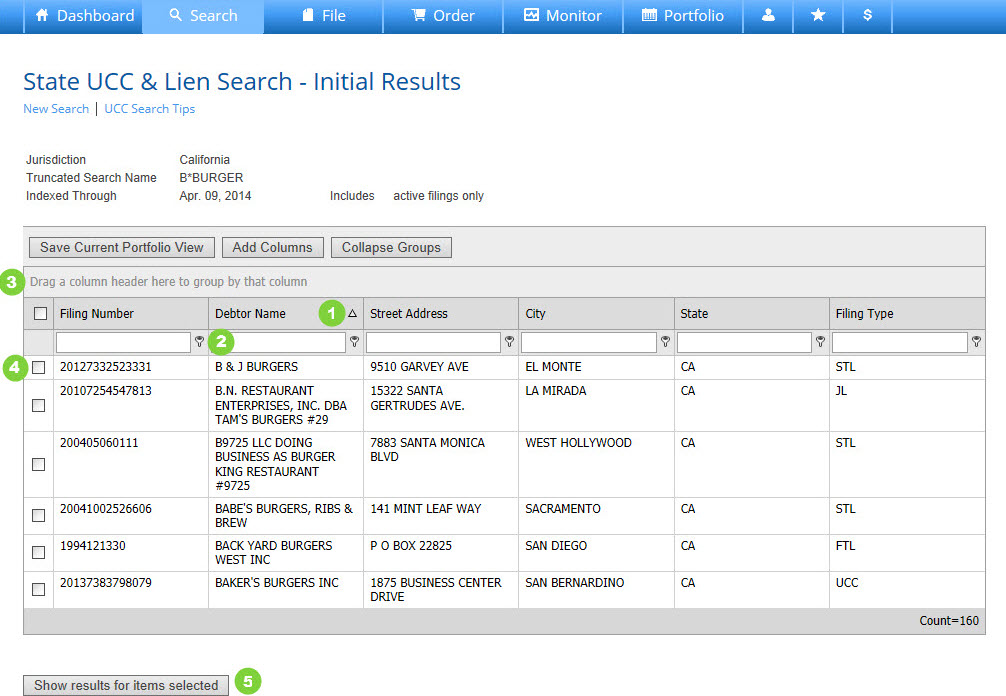
- By default, the system will display results sorted by debtor name, in ascending order. Click once in any column heading to sort Preliminary Search Results by that field in ascending order; click again for descending. Remember, the search results will include matching Organizations and Individual names regardless of how you are searching.
- From here you can sort columns, add or remove columns from your grid display (press Save Current Portfolio View to set this as your new default view) and filter Preliminary Search Results. Type in the search box on the top of each column to filter your results, and click the filter icon to expose additional options.
- Click in a column heading and drag it to the shaded area at the top of the grid to group results (by Jurisdiction, Created Date, etc.). Click on the “X” to remove grouping.
- Review Preliminary Search Results and check the box next to any record to add to your Final Results Report. Check the box in the upper left hand corner of results to select all.
- Press Show Results for items selected to generate Final Results Report.
_________________________________________________
Perform a Debtor Name Search – Final Results
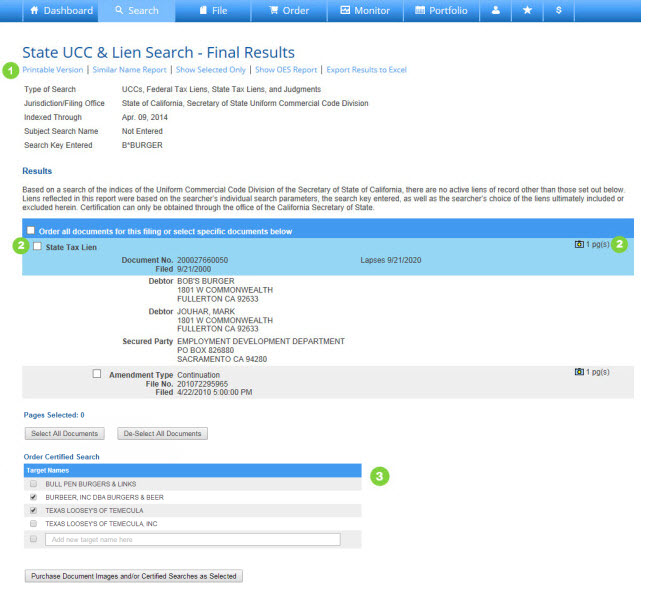
- Press Printable Version to generate a reformatted version of the Final Results Report. Print a Similar Name Report for a list of records from the Preliminary Search Report that were not included on the Final Results Report. Export Results to Excel to open results in a spreadsheet format.
- Print/View Document Images
- To view individual records, press the blue camera icon on the right of the screen
- To request copies of multiple documents at one time, check the box next to the individual records or scroll to the bottom of the page and press Select All.
- Select or type in any target names to order certified searches.
- Press Request Documents as Marked to advance. This will take you to a Document Request recap screen; you have not yet purchased the requested documents.
_________________________________________________
Perform Debtor Search – Document Download
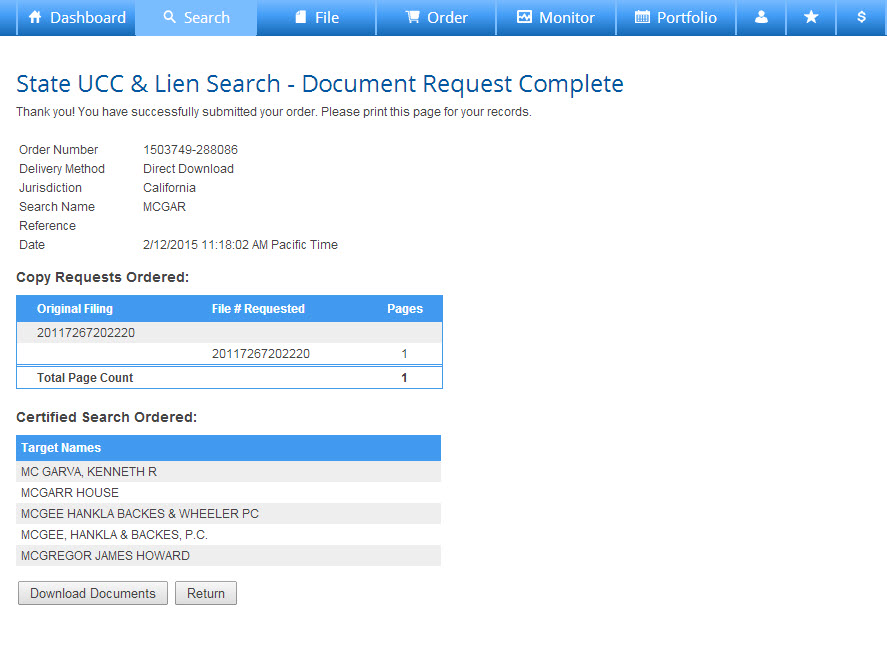
- Press Download Documents to view the file of purchased images.
- Hover your cursor over the “$” icon to view current charges for this request. Note, additional charges may apply if offline documents must be retrieved to complete your order or if a certified search was requested.
- Press Return to go back to the on-screen version of the Final Results Report.
How to Perform a Debtor Name Search